Although I wish I could've done him in Substance Painter, here is where I've modeled and unwrapped my mini assets (ex. the clock, dynamite, and bomb) and applying a quick paint in ZBrush. Exported my Normal, AO, and Texture Paint Maps for texture application in Marmoset. These assets should round up to a good 3,000 quads; just enough to make my contract of retaining a 8K-12K polycount, but a lot needs to be done.
Artist name: Purple Ace! I excel through quality, hard-work ethic, originality, and multi-media: watercolor, figure drawings, concept art, character modeling, character animating, and motion graphics. Watch my work in progress! I'm growing to be a success.
Meet the Purple Ace!

Friday, April 28, 2017
Wednesday, April 26, 2017
Final Presentation of Clocksworth
A lot has changed. A lot has happened. A lot has become ugly. Its Clocksworth lol. Here is my Final Presentation of my model that had to be 8,000-12,000 Quads. And without the tiny props on his hat (the bomb, dynamites, and clock), my Polycount came to just about 8,000 Quads, so I'll definitely have more than enough geometry to go off of for completing my assets. I imported my (soften normals) OBJ character meshes, and applied all of my merged UV maps: Color, Occlusion, and Normals into Marmoset. Here I was able to create a 3-point lighting, snap turn-around photos, and render out a turn-around with Wireframe.
TEXTURE PAINT MAP (TM) OCCLUSION MAP (AO) NORMAL MAP (NM)


ATTEMPTING THE BOMB IN SUBSTANCE PAINTER... (now learning)
Tuesday, April 25, 2017
Texture Painting on Lowpoly Projections
After I projected my highpoly detail to my lowpoly retopos, I was able to start painting onto my lowpolys for easy export and lowpoly count. I actually like this process: The Painting process in ZBrush, or in any program even. This is the part where I'm able to apply what I know about painting here and showing that "details matter". I attached here below some screenshots of a turn-around where I was painting onto my Lowpolys (already high-projected) working inside ZBrush.
Monday, April 24, 2017
Retopology in Maya (retaining polycount_
Here I began my retopology with consideration of my polycount to be 8,000-12,000 Quads, I was able to achieve this within the character of only 8K now, so that way, I'll have 3K left of the mini lowpoly assets, which will come much later on. Finishing my retopo, imported these into ZBrush and began my highpoly projections to my lowpoly retopos.
Sunday, April 23, 2017
Creating the Tie & Cloak in Marvelous Designer
Back at it again with Marvelous! Working on importing my decimated high-poly hat into MD where I can create the cloth material for it (this will help lower my poly count too). Started to do the Cloak and Tie in Maya, but what the hey. I may as well keep the realistic clothing look, right? Let's hope time doesn't catch up with me.
Labels:
3d,
animation,
art,
artist,
autodesk maya,
character,
character concept,
character design,
clothing,
clothing concept,
fashion,
high poly,
low poly,
marvelous designer,
zbrush
Location:
Stone Mountain, GA, USA
Saturday, April 22, 2017
Finshing Off in Marvelous Designer
Marvelous is an amazing program. Although I thought I'd take minute a few minutes to create clothing, it actually does take QUITE SOME PATIENCE to get the appropriate look. But here it goes! I was able to simulate the Collar-Shirt, Sleeves, High Pants, and Vest so far! All I have left to do is the Cloak & Dress Tie and then I'll be off to Quadrangulate the mesh, import OBJ into Maya, and GoZ into ZBrush.
Labels:
3d,
animation,
art,
artist,
autodesk maya,
cartoonish game,
character,
character concept,
character design,
clothing,
design,
fashion designer,
marvelous designer,
textures,
texturing
Location:
Stone Mountain, GA, USA
Friday, April 21, 2017
Indroducing Myself to Marvelous Designer
Hey! I FINALLY LEARNED MARVELOUS DESIGNER ON MY OWN! It took me quite awhile being that we was my first time, but I can now say I've gotten the hang of it. So what I done originally, was took some time to use MD's Boy Avatar to start off creating the collar-shirt (the collar was a huge pain) but I pulled through! I snapped some screenshots of my work in progress.
Labels:
3d,
animation,
art,
artist,
autodesk maya,
blending colors,
cartoonish game,
character,
character concept,
character design,
clothing,
concept,
design,
fashion designer,
model,
modeling,
tim burton,
zbrush
Location:
Stone Mountain, GA, USA
Wednesday, April 19, 2017
Rough Design Update
Here's another update on Clocksworth! Here I applied the basic color blinns to my retopology in Maya for a quick presentation update. All base models done in Maya, and the head, face, and arms are sculpted in ZBrush so far.
Based on my critique today, going to continue adding details and wrinkles in Zbrush to my other body meshes: for the Hat & Shoes. (Slightly adjust the nose a little). BUT, Thinking about using a new clothing program, Marvelous Designer to redo the clothing for a more realistic, edgy appeal. We'll see how this goes lol, wish me luck!
Based on my critique today, going to continue adding details and wrinkles in Zbrush to my other body meshes: for the Hat & Shoes. (Slightly adjust the nose a little). BUT, Thinking about using a new clothing program, Marvelous Designer to redo the clothing for a more realistic, edgy appeal. We'll see how this goes lol, wish me luck!
Labels:
3d,
autodesk maya,
character concept,
character design,
concept,
marmoset,
material lighting,
maya,
model,
modeling,
sculpting,
sculpture,
zbrush
Saturday, April 15, 2017
Retopology & Quick Colors
Hey! Just started Quad Drawing up my clothing! Cute results yes, but I think I want to try the cape in Marvelous Designer (if I can make the extra time). Final poly count is to be from 8,000-12,000 polys. Wish me luck!
Wednesday, April 12, 2017
Creating my Base Mesh & Simple Anatomy
I grabbed a stylized base mesh online, and altered the mesh accordingly. Adding details and constructing the face based off the reference given. [ALOT OF CHANGES MADE] I think I'm going to name this character "Clocksworth!" (Yeah lol, that'll fit.)
Dessimated, and reimported into Maya to retranslate the mesh to begin retopology.
Dessimated, and reimported into Maya to retranslate the mesh to begin retopology.
Wednesday, April 5, 2017
Selecting a Concept for Portfolio Foundations
Hey guys! Just been introduced to this class this quarter, so hopefully I can pull through. We were assigned to search for a character (with our professor's approval) and we can sign a contract.
I went with this little guy (concept by Edouard Guiton)! I wanted to be able to step out my comfort zone a little of the cutesy phase, and go with more of a Tim Burton kind of feel. I'm really excited!
I went with this little guy (concept by Edouard Guiton)! I wanted to be able to step out my comfort zone a little of the cutesy phase, and go with more of a Tim Burton kind of feel. I'm really excited!
Subscribe to:
Comments (Atom)
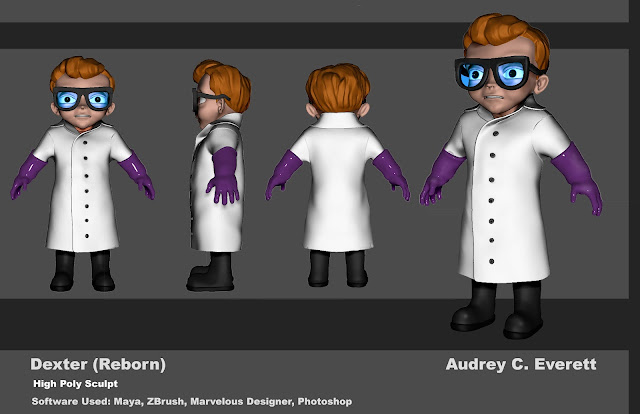
Dexter Final Update! ZBrush model by Audrey C. Everett
Concept by yours truly, Audrey C. Everett 1. Made some adjustments to his boots and cleanup his anatomy on his pinky. 2. Using th...

-
Back at it again with Marvelous! Working on importing my decimated high-poly hat into MD where I can create the cloth material for it (this ...
-
Concept by yours truly, Audrey C. Everett 1. Made some adjustments to his boots and cleanup his anatomy on his pinky. 2. Using th...


